
Providers
Providers are a core concept in Nest. Many of the basic Nest classes, such as services, repositories, factories, and helpers, can be treated as providers. The key idea behind a provider is that it can be injected as a dependency, allowing objects to form various relationships with each other. The responsibility of "wiring up" these objects is largely handled by the Nest runtime system.
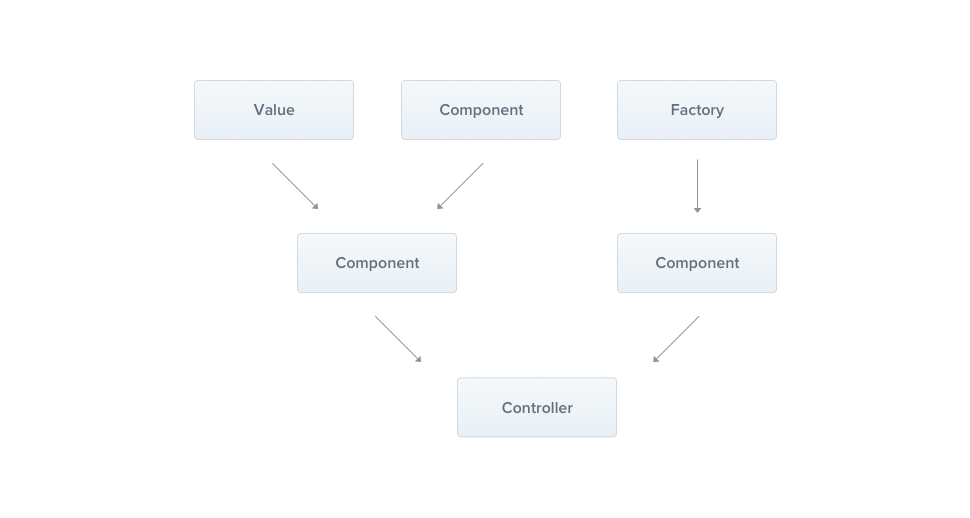
In the previous chapter, we created a simple CatsController. Controllers should handle HTTP requests and delegate more complex tasks to providers. Providers are plain JavaScript classes declared as providers in a NestJS module. For more details, refer to the "Modules" chapter.
Hint Since Nest enables you to design and organize dependencies in an object-oriented manner, we strongly recommend following the SOLID principles.
Services#
Let's begin by creating a simple CatsService. This service will handle data storage and retrieval, and it will be used by the CatsController. Because of its role in managing the application's logic, it's an ideal candidate to be defined as a provider.
import { Injectable } from '@nestjs/common';
import type { Cat } from './interfaces/cat.interface.js';

@Injectable()
export class CatsService {
  private readonly cats: Cat[] = [];

  create(cat: Cat) {
    this.cats.push(cat);
  }

  findAll(): Cat[] {
    return this.cats;
  }
}
import { Injectable } from '@nestjs/common';

@Injectable()
export class CatsService {
  constructor() {
    this.cats = [];
  }

  create(cat) {
    this.cats.push(cat);
  }

  findAll() {
    return this.cats;
  }
}
Hint To create a service using the CLI, simply execute the $ nest g service cats command.
Our CatsService is a basic class with one property and two methods. The key addition here is the @Injectable() decorator. This decorator attaches metadata to the class, signaling that CatsService is a class that can be managed by the Nest IoC container.
Additionally, this example makes use of a Cat interface, which looks like this:
export interface Cat {
  name: string;
  age: number;
  breed: string;
}
Now that we have a service class to retrieve cats, let's use it inside the CatsController:
import { Controller, Get, Post, Body } from '@nestjs/common';
import { CreateCatDto } from './dto/create-cat.dto.js';
import { CatsService } from './cats.service.js';
import type { Cat } from './interfaces/cat.interface.js';

@Controller('cats')
export class CatsController {
  constructor(private catsService: CatsService) {}

  @Post()
  async create(@Body() createCatDto: CreateCatDto) {
    this.catsService.create(createCatDto);
  }

  @Get()
  async findAll(): Promise<Cat[]> {
    return this.catsService.findAll();
  }
}
import { Controller, Get, Post, Body, Bind, Dependencies } from '@nestjs/common';
import { CatsService } from './cats.service.js';

@Controller('cats')
@Dependencies(CatsService)
export class CatsController {
  constructor(catsService) {
    this.catsService = catsService;
  }

  @Post()
  @Bind(Body())
  async create(createCatDto) {
    this.catsService.create(createCatDto);
  }

  @Get()
  async findAll() {
    return this.catsService.findAll();
  }
}
The CatsService is injected through the class constructor. Note the private keyword: it is TypeScript shorthand that declares and initializes the catsService member in the same line. The next section looks at what Nest does with that declaration.
Dependency injection#
Nest is built around the powerful design pattern known as Dependency Injection. We highly recommend reading a great article about this concept in the official Angular documentation.
In Nest, thanks to TypeScript's capabilities, managing dependencies is straightforward because they are resolved based on their type. In the example below, Nest will resolve the catsService by creating and returning an instance of CatsService (or, in the case of a singleton, returning the existing instance if it has already been requested elsewhere). This dependency is then injected into your controller's constructor (or assigned to the specified property):
constructor(private catsService: CatsService) {}
Two things are happening in that single line. The private keyword is a TypeScript parameter property: it declares a catsService member on the class and assigns the constructor argument to it, so you don't have to write this.catsService = catsService yourself. The type annotation CatsService is what Nest actually resolves against - at compile time, TypeScript emits the constructor's parameter types as metadata, and the container reads that metadata to work out which provider to supply.
Warning Because resolution is driven by the emitted type, the annotation has to be something that still exists at runtime - that is, a class. An interface or a type alias is erased during compilation, soconstructor(private config: AppConfig)whereAppConfigis an interface leaves Nest with nothing to look up, and you'll see a "Nest can't resolve dependencies" error at startup. When you need to inject something that isn't a class, give it a token and inject it explicitly with@Inject()- see Custom providers.
Scopes#
Providers typically have a lifetime ("scope") that aligns with the application lifecycle. When the application is bootstrapped, each dependency must be resolved, meaning every provider gets instantiated. Similarly, when the application shuts down, all providers are destroyed. However, it's also possible to make a provider request-scoped, meaning its lifetime is tied to a specific request rather than the application's lifecycle. You can learn more about these techniques in the Injection Scopes chapter.
Custom providers#
Nest comes with a built-in inversion of control ("IoC") container that manages the relationships between providers. This feature is the foundation of dependency injection, but it's actually much more powerful than we've covered so far. There are several ways to define a provider: you can use plain values, classes, and both asynchronous or synchronous factories. For more examples of defining providers, check out the Dependency Injection chapter.
Optional providers#
Occasionally, you may have dependencies that don't always need to be resolved. For example, your class might depend on a configuration object, but if none is provided, default values should be used. In such cases, the dependency is considered optional, and the absence of the configuration provider should not result in an error.
To mark a provider as optional, use the @Optional() decorator in the constructor's signature.
import { Injectable, Optional, Inject } from '@nestjs/common';

@Injectable()
export class HttpService<T> {
  constructor(@Optional() @Inject('HTTP_OPTIONS') private httpClient: T) {}
}
In the example above, we're using a custom provider, which is why we include the HTTP_OPTIONS custom token. Previous examples demonstrated constructor-based injection, where a dependency is indicated through a class in the constructor. For more details on custom providers and how their associated tokens work, check out the Custom Providers chapter.
Note that @Optional() changes what happens when the provider is missing, not what you receive when it is present: if nothing is registered under HTTP_OPTIONS, Nest injects undefined instead of failing to start. That means the class is responsible for the fallback - typically by merging what it was given over a set of defaults, rather than assuming the value is there.
Property-based injection#
The technique we've used so far is called constructor-based injection, where providers are injected through the constructor method. In certain specific cases, property-based injection can be useful. For example, if your top-level class depends on one or more providers, passing them all the way up through super() in sub-classes can become cumbersome. To avoid this, you can use the @Inject() decorator directly at the property level.
import { Injectable, Inject } from '@nestjs/common';

@Injectable()
export class HttpService<T> {
  @Inject('HTTP_OPTIONS')
  private readonly httpClient: T;
}
Warning If your class doesn't extend another class, it's generally better to use constructor-based injection. The constructor clearly specifies which dependencies are required, offering better visibility and making the code easier to understand compared to class properties annotated with @Inject.
Provider registration#
Now that we've defined a provider (CatsService) and a consumer (CatsController), we need to register the service with Nest so that it can handle the injection. This is done by editing the module file (app.module.ts) and adding the service to the providers array in the @Module() decorator.
import { Module } from '@nestjs/common';
import { CatsController } from './cats/cats.controller.js';
import { CatsService } from './cats/cats.service.js';

@Module({
  controllers: [CatsController],
  providers: [CatsService],
})
export class AppModule {}
Nest will now be able to resolve the dependencies of the CatsController class.
At this point, our directory structure should look like this:
Manual instantiation#
So far, we've covered how Nest automatically handles most of the details of resolving dependencies. However, in some cases, you might need to step outside of the built-in Dependency Injection system and manually retrieve or instantiate providers. Two such techniques are briefly discussed below.
- To retrieve existing instances or instantiate providers dynamically, you can use the Module reference.
- To get providers within the
bootstrap()function (e.g., for standalone applications or to use a configuration service during bootstrapping), check out Standalone applications.